So, Shopify is Mad About Your Cloudflare Proxy? Here’s How to Fix It.
This Shopify error means your domain’s DNS settings use an unsupported proxy. Shopify requires a direct DNS connection to verify your domain. Cloudflare’s proxy feature, the orange cloud, blocks this connection. To fix this issue, you must disable the proxy within your Cloudflare DNS settings by turning the cloud grey.
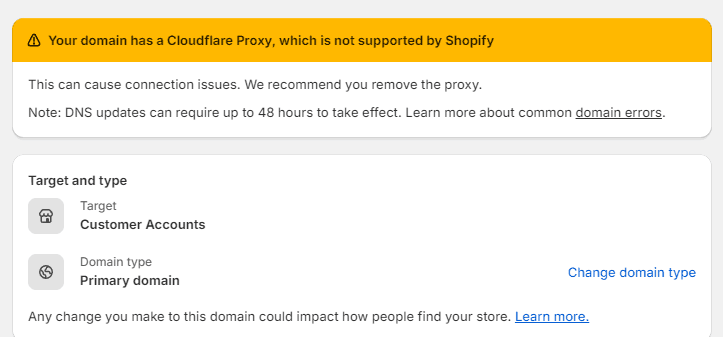
That error message. “Your domain has a Cloudflare proxy, which is not supported by Shopify.” It’s one of those super frustrating things that just stops you in your tracks. Basically, what it’s saying is that the way your domain is set up in Cloudflare is getting in the way of how Shopify needs to work. Shopify, you see, needs a direct, clean look at your domain’s settings (the DNS) to make sure it’s really yours. But Cloudflare’s proxy feature—that little orange cloud you see—acts like a security guard, blocking that direct view.
The fix, and it’s thankfully pretty simple, is to just tell that security guard to stand down. You need to go into your Cloudflare DNS settings and turn that orange cloud grey. That’s the whole game.

Why Shopify and Cloudflare Proxies Don’t Mix
It helps to know why this is even a problem. Cloudflare is this awesome service that sits in between your website visitors and your website’s server. Its whole job is to make things faster and safer. When you use it, all the traffic to your site goes through Cloudflare first.
The most important piece of this puzzle is the proxy feature. You’ll see it as a little orange cloud icon in your Cloudflare DNS settings. When that cloud is orange, Cloudflare is doing a TON of stuff—it’s actively grabbing all the traffic, caching parts of your site on its own network (its CDN) to speed things up, blocking hackers, all that good stuff.
Here’s the problem, though. Shopify is its own massive, highly-tuned machine. It already has its own super-powered CDN and it manages its own SSL security certificates for you. When you put your personal Cloudflare proxy in front of it, you’re essentially creating a traffic jam. It’s like having two different security systems fighting over who gets to check IDs at the door. Shopify’s system gets confused, it can’t verify your domain, it can’t issue the SSL certificate, and it throws up that error. The two systems create conflicts with caching, security, and just general traffic routing.
So you’re not getting rid of Cloudflare. You’re just changing its job description for Shopify from “active proxy” to just “DNS manager”.
The Core Problem: The Three Key Conflicts
The whole conflict boils down to this: Shopify is a fully hosted platform, and to do its job, it needs direct, unimpeded access to your domain’s records. That orange cloud proxy is a big impediment.
Shopify needs to do a few key things that the proxy blocks:
- It needs to verify you own the domain. When you’re setting it up, Shopify looks to see if your A record (your main domain address) points DIRECTLY to its IP address, which is 23.227.38.65. The Cloudflare proxy hides this real IP and shows a Cloudflare IP instead. So, Shopify’s automated check looks, sees the wrong IP, and says, “Nope, can’t confirm you own this.” Error.
- It needs to handle its own security. Shopify gives you a free SSL certificate, which is what puts the little padlock in the browser bar and keeps customer data safe. But to install and renew that certificate, it needs a direct connection to your domain. The proxy gets in the way of this process, too.
- It uses its own CDN. As we mentioned, Shopify already has a crazy-powerful global CDN. Putting your personal Cloudflare account’s CDN in front of it is redundant and messy. It’s called “double-caching,” and it can lead to weird issues like customers seeing old prices or out-of-stock items because your Cloudflare account is showing them a stale, outdated version of the page.
Recognizing the issue in your Cloudflare account is easy once you know what you’re looking for. Log in, go to your domain, and click on “DNS”. Look at the list of records. The “Proxy status” column is everything.
- Orange Cloud (Proxied): This is the problem. It means Cloudflare is being a middleman.
- Grey Cloud (DNS Only): This is the solution. It means Cloudflare is just acting like a phonebook, pointing your domain name to the right IP address.
Your job is to click the orange cloud and make it grey.
How to Fix the “Cloudflare Proxy” Error: Step-by-Step
Alright, enough theory. Let’s resolve this thing. The error “your domain has a cloudflare proxy, which is not supported by shopify” is all about making a couple of quick clicks.
Step 1: Get to Your Cloudflare DNS Settings
- Log in to Cloudflare. Obvious, I know.
- On the main dashboard, click the domain you’re trying to use for Shopify.
- Find the “DNS” icon in the menu on the left. Click it. You’re now on the page where the magic happens.
Step 2: Turn Off the Proxy for the A Record
Your main domain address (the “root” domain) has to point straight to Shopify.
- Find the “A” record in your list. The “Name” will probably be an @ symbol, or just your plain domain name like yourstore.com.
- Make sure the “Content” (the IP address) is Shopify’s: 23.227.38.65.
- Now, look at the “Proxy status” column. The cloud is probably orange. Click the orange cloud.
- It will turn grey. The status will now say “DNS Only”. It saves automatically. That’s it. That’s the setting you want.
Step 3: Turn Off the Proxy for the ‘www’ CNAME Record
You need to do the same thing for your ‘www’ address.
- Find the “CNAME” record in the list. The “Name” will be www.
- The “Content” should be shops.myshopify.com.
- Check the “Proxy status”. If that cloud is orange, click it to turn it grey.
- The status should now be “DNS Only”. Perfect.
Step 4: Go Back to Shopify and Verify
Now that you’ve fixed things in Cloudflare, you have to tell Shopify to check again.
- Go back to your Shopify admin panel.
- Go to Settings and then Domains.
- Click on the domain that had the error.
- You should see a button that says something like “Verify connection”. Click that sucker.
- Shopify will check your settings again. If you did it right, the error will vanish and the status should change to “Connected.” An SSL certificate will show up as “Pending” and then become active shortly after. If it doesn’t work right away, give it a minute or two and try again. DNS changes can sometimes take a moment.
Important: Check These Other Cloudflare Settings
Just turning off the proxy for those two records fixes 99% of the issues. But while you’re in Cloudflare, there are a couple of other things to check to avoid future headaches.
- SSL/TLS Mode: In your Cloudflare SSL/TLS settings, you might have it set to “Flexible.” This is a bad idea. It can cause weird redirect loops. The real fix is disabling the proxy (the grey cloud), because then Shopify handles all the SSL stuff itself. But if for some reason you have the proxy on for other non-Shopify records, make sure this setting is on “Full (Strict)”. For Shopify, though, just let the grey cloud solve it all.
- Page Rules: This is a big one. Cloudflare Page Rules are powerful, but they can completely break your store if you’re not careful. If you have a rule that tells Cloudflare to “Cache Everything” for your whole domain, you will break your shopping cart and checkout. People won’t be able to log in or buy things. Go to the “Rules” section in Cloudflare and make sure you don’t have any aggressive caching rules applied to yourstore.com/*. It’s best to have no Page Rules for your Shopify domain at all.
Tl;dr: The One-Minute Summary
Connecting Cloudflare and Shopify really comes down to one thing: Shopify needs to see your domain directly. The “unsupported proxy” error is just Shopify telling you that Cloudflare is standing in the way.
The solution is always in your Cloudflare DNS settings. You change the orange cloud to a grey cloud for your A record and your www CNAME record.
This one simple change lets Shopify do its job: it can verify your domain, manage your security certificate, and use its own powerful CDN. You get to use Cloudflare for its excellent DNS management, and Shopify for its excellent e-commerce platform. No more conflicts, no more errors.
Commonly Asked Questions
Below are common questions we get asked.
Wait, but doesn’t Shopify use Cloudflare itself? This is confusing.
Yes, it does! Shopify uses a special, high-end enterprise version of Cloudflare that’s built right into its platform. When you run your domain through your own free, personal Cloudflare account with the proxy on, you’re creating a conflict with their built-in system. You need to let traffic go directly to Shopify’s network so their system can work right.
What’s the one setting that causes all the trouble?
The proxy setting. The orange cloud. That’s it. It’s the root of all evil in this specific scenario. You have to change it to “DNS Only,” which is the grey cloud, so your domain connects properly.
How do I fix this again, real quick?
Log into Cloudflare. Go to DNS. Find the A record and the www CNAME record. Click the orange cloud next to each one to make it turn grey. Go back to Shopify and click “Verify connection.” Done.
Ready to Boost Your Shopify Store?
Increase revenue with video upsells and dominate search rankings with AI-powered SEO.
Related Articles
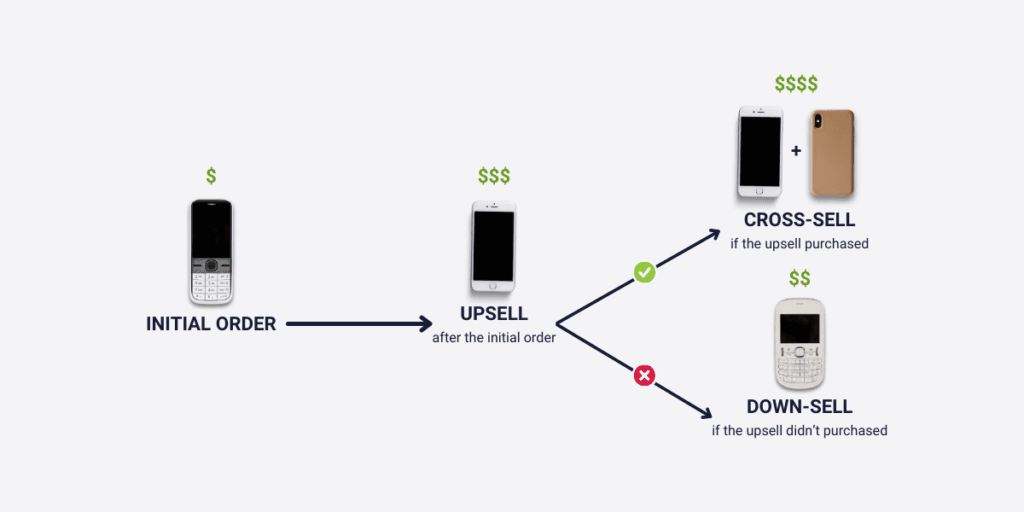
Difference Between An Upsell & Downsell? It’s About Unlocking Revenue and Customer Value
An upsell persuades a customer to purchase a more expensive, upgraded version of a product. This strategy increases average order value. A downsell offers a customer a lower-priced alternative after they decline the initial offer. This secures a sale that might otherwise be lost, recovering potential revenue. The whole idea is getting more revenue and, […]
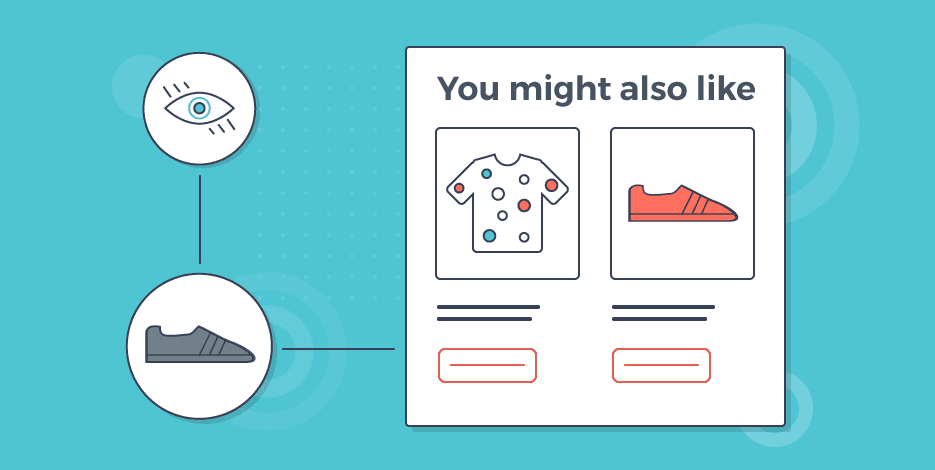
Want to Upsell on Shopify and Actually Make More Money?
To upsell on Shopify, first install an upsell app from the App Store. Next, create specific offers that suggest a product upgrade. Display these offers directly on product pages, in the cart, or at checkout. You can also present post-purchase upsells on the thank you page for one-click acceptance. Okay, so how do you upsell […]
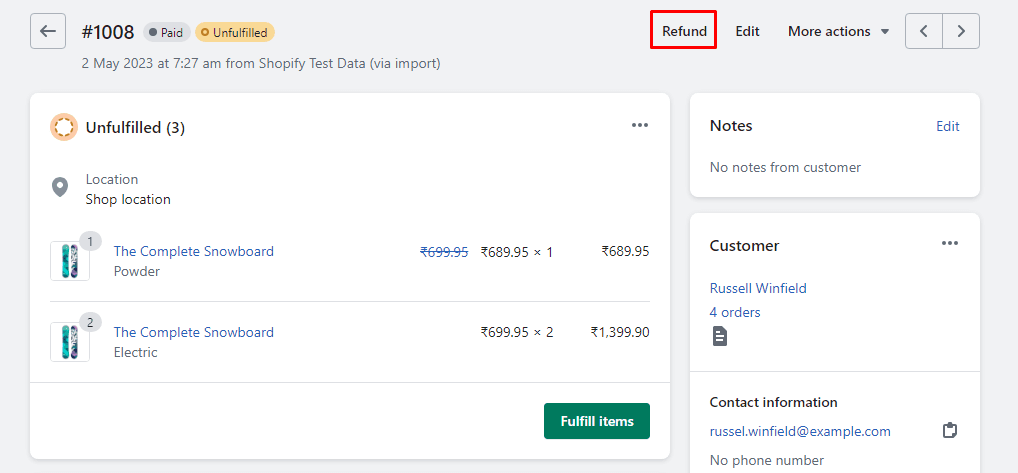
Shopify Refunds: The Real, Messy Scoop for Businesses
A Shopify refund takes 5 to 10 business days to appear in a customer’s account. When a store issues a refund, Shopify immediately sends the request to the customer’s bank. The bank then needs to process this transaction, which causes the delay. The exact timing can vary by bank. Look, you want the quick answer? […]